Usage
Folder structure
nmrml2isa only requires that you put all you nmrML and zipped raw files in the same folder, and parsing should work fine. Note that reference to RAW files is extracted from the mzML files, so if you plan to create an ISA archive after mzml2isa creates ISA files, don’t forget to include those as well.
Example structure:
/
└ home/
  └ metabolomics/
    └ nmrML_study1/     # the name of the folder doesn't matter
      ├ Sample1.nmrML  # the name of the file must correspond to the sample name
      ├ Sample2.zip    # the raw files should be zipped and called exactly like the nmrML
      ├ Sample2.nmrML
      ├ Sample2.zip
      └ ...
    └ nmrML_study2/
      ├ Sample1.nmrML
      ├ Sample2.zip
      ├ Sample2.nmrML
      ├ Sample2.zip
      └ ...
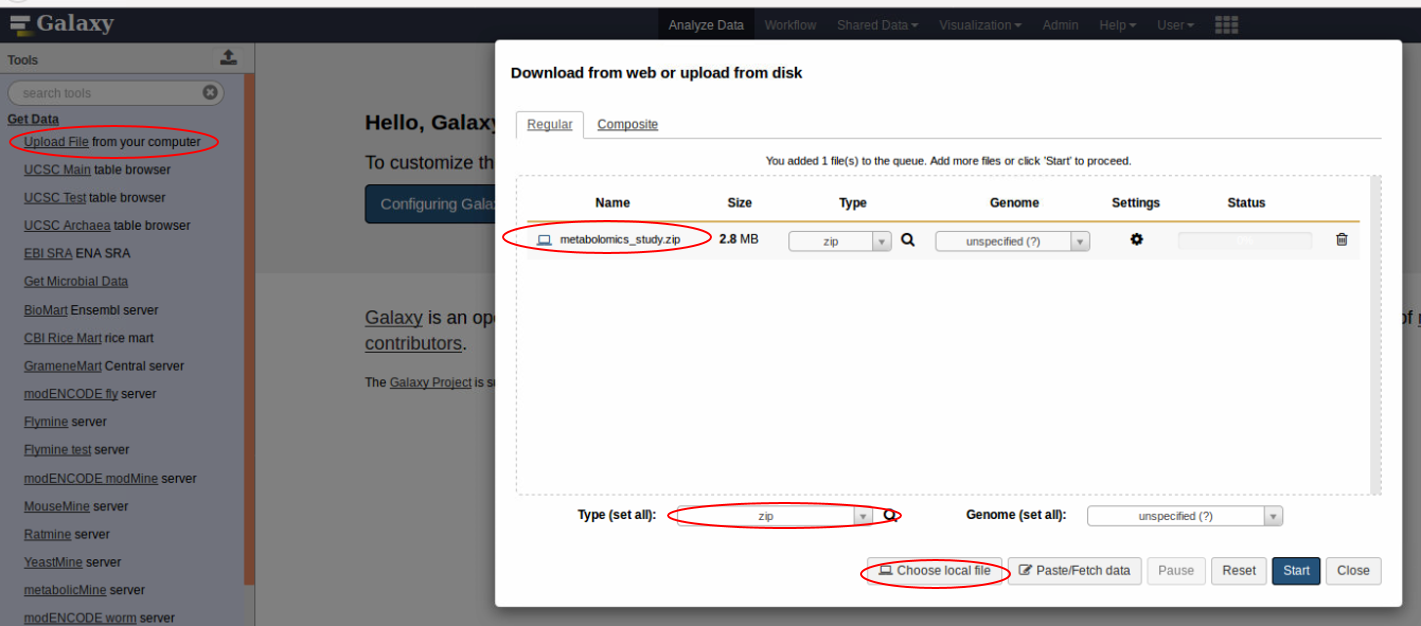
The folders need to be zipped before adding to galaxy e.g. nmrML_study1.zip. The zipped folders are then added 1 at a time through the GetData interface of Galaxy.
Getting data into Galaxy
Using the GetData tab, add the zipped metabolomics study into galaxy. Remember to use the ‘zip’ file type

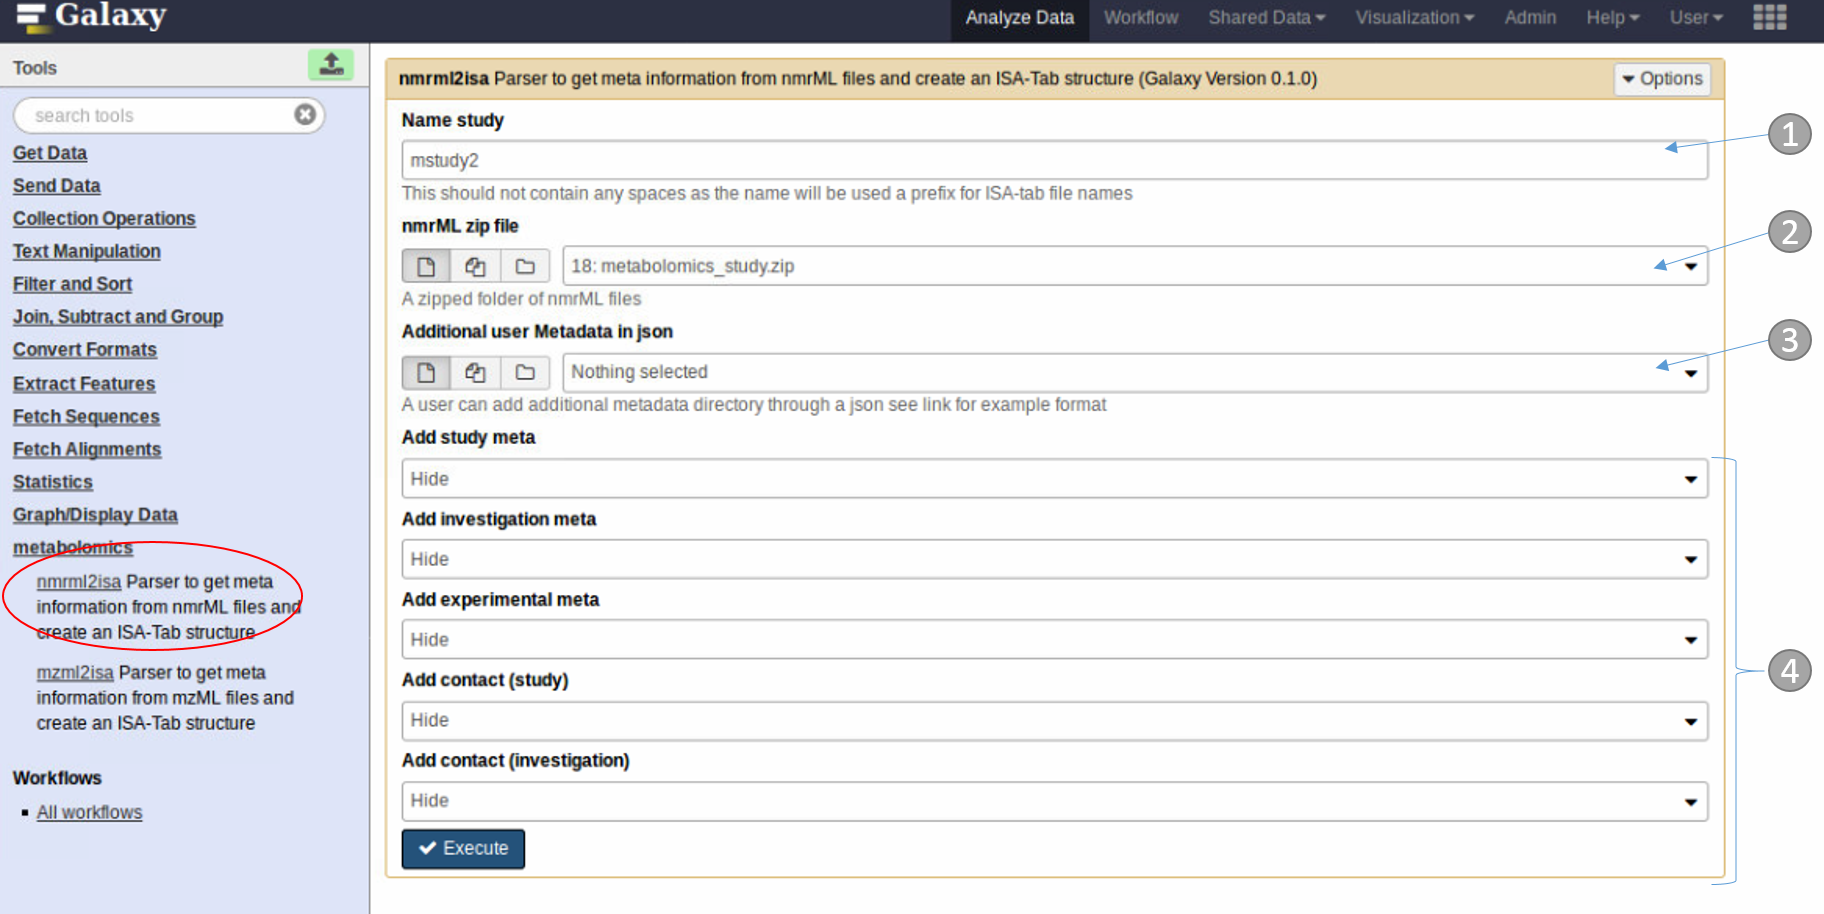
Running nmrml2isa

- Study name
- zipped folder containing the nmrML files
- For advanced users only. This allows any additional metadata to be added in json format
- Optional simple additional metadata can be added manually through the dropdown tabs
Output

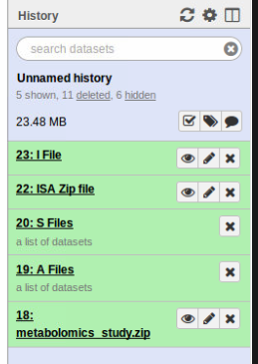
The output consists of the following:
- I File: Investigation file
- S Files: Dataset collection containing 1 or more study files
- A Files: Dataset collection containing 1 or more assay files
- ISA zip file: A zip file containing all of the outputs
Editing with ISAcreator
The ISA-Tab structure can be further populated with the ISAcreator software.
See brief tutorial for more details.